New Sales and Customers
Creating New Sales
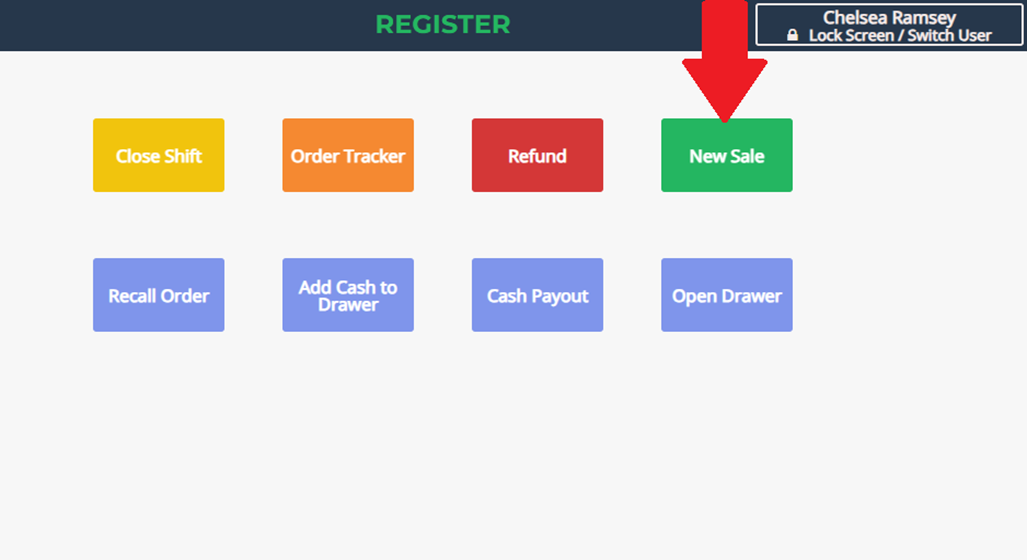
Step 1: Accessing the Register
- Select the Register option from the dashboard.
- Enter your PIN if prompted.
- You may already be on the Register Screen.

Step 2: Selecting New Sale
- Click New Sale to begin a transaction.
Retail Transactions
- Finding a customer is not required for most retail transactions.

Adding & Finding Items
- Start with the first multi-colored column labeled “Department”.
- Selecting a department reveals all available items for that department.
- Example: If you select Retail Sales, all items available in that department will be displayed.

Accepting Laundry Items
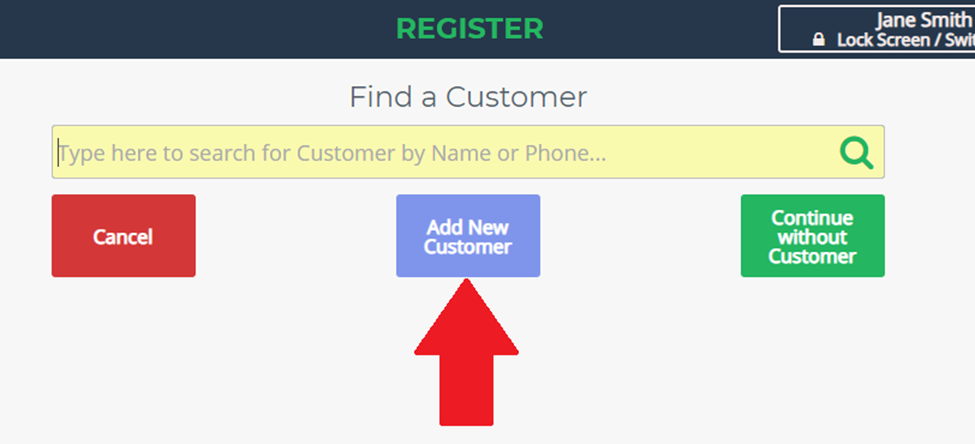
- When accepting laundry items from a customer, a customer must be selected.

Selecting an Existing Customer
- Begin typing the customer’s name, company, or phone number.
- The system will search for and recommend a match.
- Select the customer as soon as you see their name.
- You do not need to type the full name if the correct customer appears.
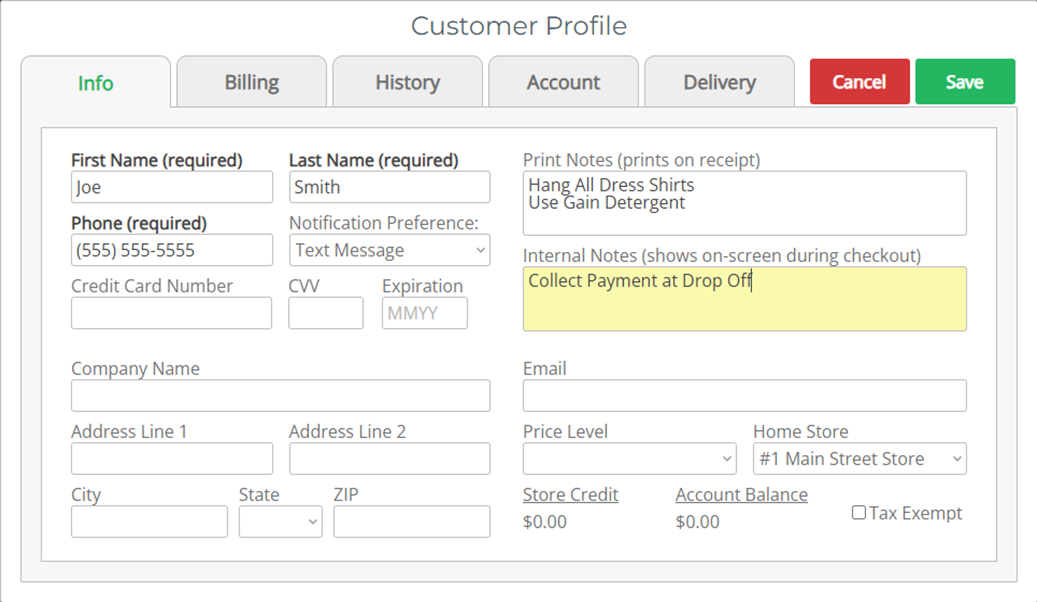
Entering Notes
- Print Notes: These notes will appear on the printed receipt and may be reviewed with the customer.
- Internal Notes: These notes do not appear on the receipt but are for internal use (e.g., "Do not accept checks from this customer" or "Customer is banned from drop-off").


Step 3: Creating a New Customer
- Confirm that the customer is not already in the database before adding them.
- We recommend asking the customer if they have visited before.
- A customer may already be in the system under:
- A different phone number
- A spouse’s name (if they share an account with prior notes)
- If the customer does not have an existing account:
- Tap Add New Customer to continue.
Step 4: Entering Customer Information
- Enter all required information for the new customer:
- First Name and Last Name
- Phone Number
- Notification Preference (Text Message, Email, or None)
- Ask the customer if they have any special instructions for their account.
- Example: "Always hang dress shirts."
Step 5: Additional Account Settings
- Home Store (Default Setting)
- By default, this should be set to the current store location.
-
Some laundromats run all commercial accounts through a specific "Home Store."
Price Level (Optional)
- A Price Level can apply a specific discount or premium to a customer's orders.
- This setting is useful for:
- Discounts: Veteran, student, or senior discounts
- Premiums: Commercial accounts dealing with smoke damage, heavy oils, or special handling
- Price Levels can only be created by managers and should be applied based on store policy.
- Click Save to finalize the new customer profile.