
Enabling Pickup & Delivery
ntroduction
The information listed below will show you how to enable this new feature and will demonstrate what your customers will experience when scheduling pickup and delivery through a link on your website.
More features are in development and we fully expect that more features and refinements will be developed based on feedback submitted through your support tickets.
Enabling Pickup and Delivery
Step 1: Enable Pickup and Delivery
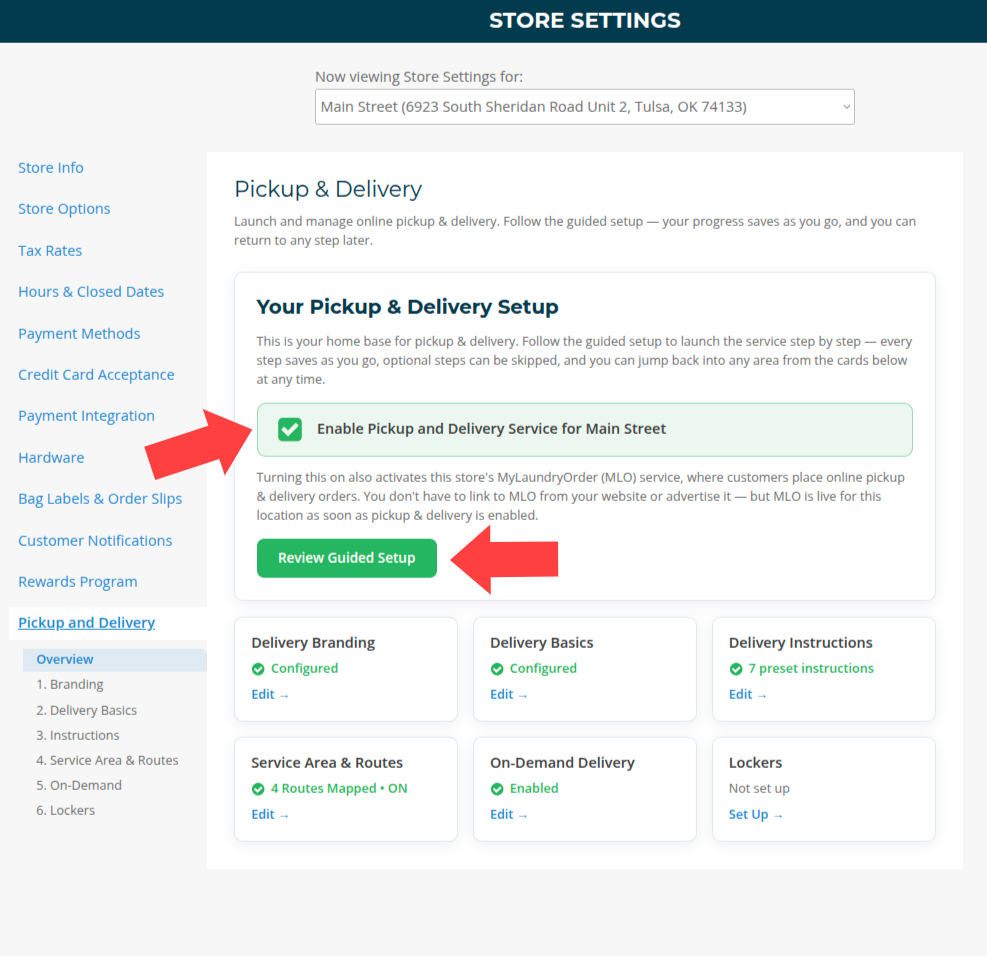
- Click the gear icon in the top right of WDF POS and go to Store Settings.

- Navigate to the Overview section of the Pickup and Delivery tab.
- Check the box labeled Enable Pickup and Delivery Service.
- We highly recommend you go through a guided setup at this point! To do so, please click the Review Guided Setup button.
Step 2: Create a Route and Add a Serviceable Area
Whether you're using scheduled route-based delivery or on-demand delivery (Uber, DoorDash, etc.), you need to add at least one route with zip codes to filter incoming requests.
To do this:
- Go to the Pickup and Delivery tab in Store Settings
- Create a route by clicking Add Route
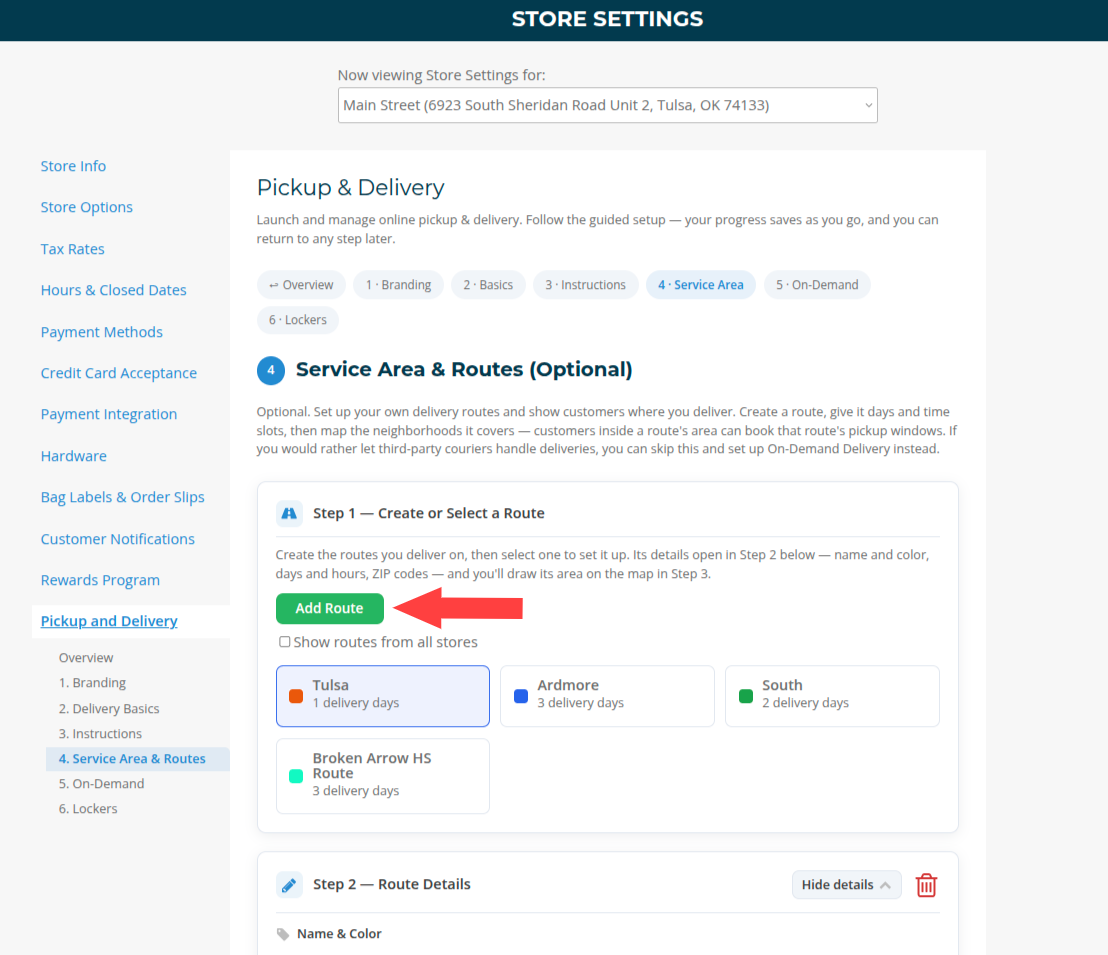
- You can now edit this route by clicking the route then editing the contents in Step 2 - Route Details
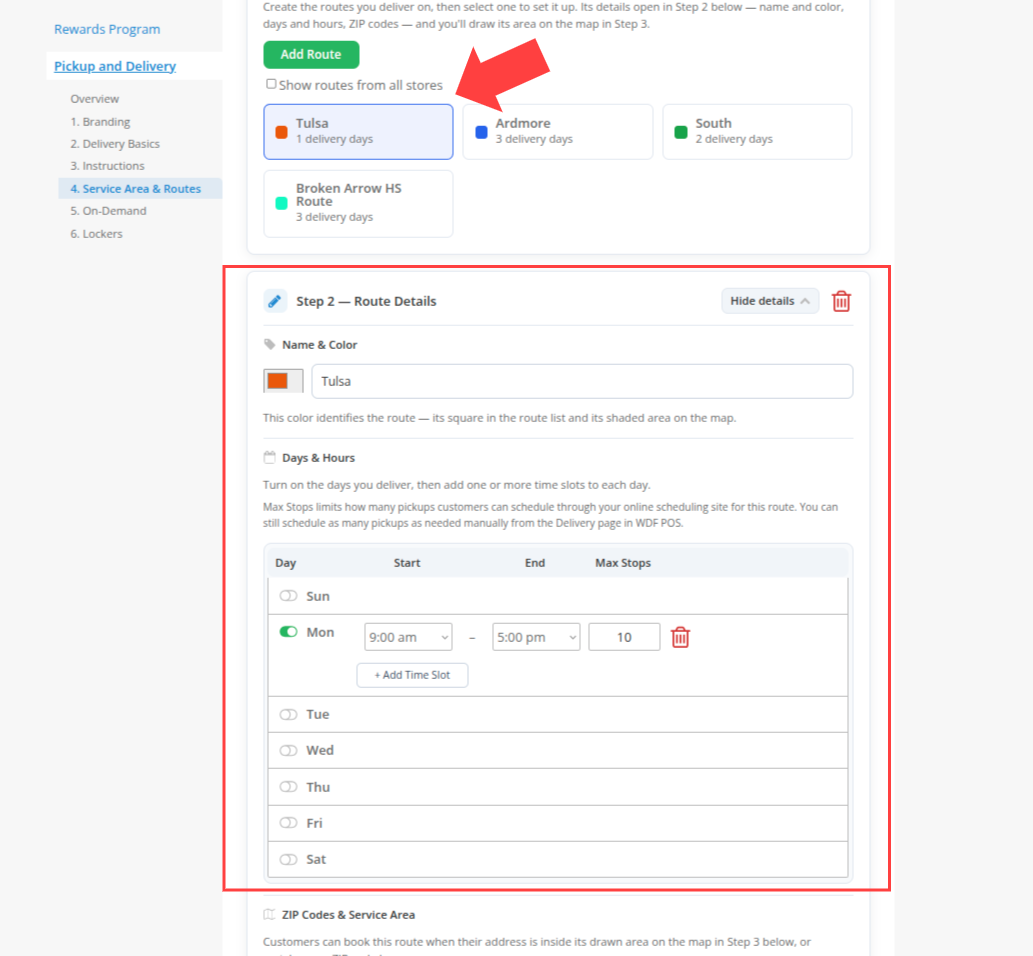
- Look for the ZIP Codes & Service Area section.
- You can add ZIP codes directly to distinguish specific ZIP codes you would like to service. You can add these ZIP codes directly using the Add ZIP button, or you can find ZIP codes in a radius using the Find Nearby tool
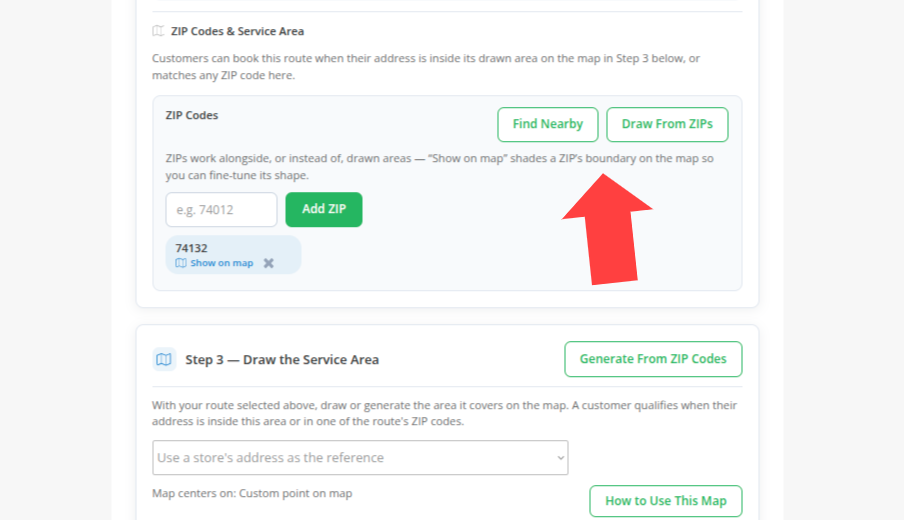

- The other method is drawing a serviceable area using the Draw the Service Area tool. You can find this tool under Step 3 — Draw the Service Area


- You can use a combination of both of these tools methods as well as the Draw from ZIPs tool to draw a map from the serviceable ZIP codes you have listed.
Disclaimer: Drawable ZIP codes are determined by a built-in census tool. Not all listed ZIP codes can be drawn with the Draw from ZIPs tool.
Creating a Pickup or Delivery
- Click the menu icon in the top-left corner.
- Navigate to the Delivery page.

- View scheduled events on the calendar.
- To create a new pickup:
- Search for an existing customer or add a new one.
- Enter the customer's address.
- Select a pickup and delivery date (e.g., pickup on Monday, deliver on Wednesday).
- Choose a route or set a custom time.
- Specify the number of bags for pickup.
- Optionally, add delivery notes (e.g., gate codes) and order notes (e.g., laundry preferences).
- Set up a recurring event if needed.
Managing Delivery Orders
- On the morning of a delivery day, select all scheduled orders and mark them as Confirmed.
- Sort unassigned orders:
- Drag and drop orders into the appropriate route.
- Click Optimize for the most efficient route.
- Click the Print icon to generate a paper version for the driver, or view stops on a mobile device.
Making Pickups and Deliveries
- While on the road, select an order to:
- Call or text the customer.
- Get GPS navigation to the address.
- Update the order status (e.g., "On Vehicle").
- Mark an order as Canceled if necessary.
- Canceling a single event in a recurring series will not affect future pickups.
- Back at the store, view completed orders and mark them as Done.
Creating Orders from Pickups
- Staff can create orders from completed pickups on the Register page.
- Pickup orders marked as Done will be listed for processing.
- To create a delivery from an existing Wash-Dry-Fold order, click Deliver Order.
Conclusion
This tutorial covered how to enable and use the pickup and delivery features of Wash-Dry-Fold POS.