
Creating On Account Customers
Step 1: Enabling "On Account" for a Customer
- Click New Sale and search for the customer using their name or phone number. You can also view and edit a customer's profile from the "Customers" tab in the side menu.
- Click Edit on the customer’s profile.
- Navigate to the Billing tab.
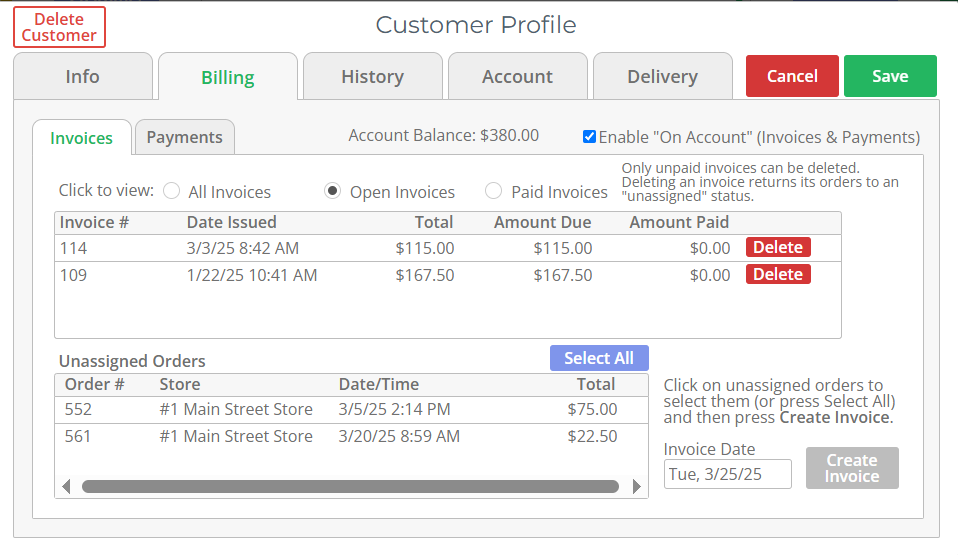
- Check the box for "Enable ‘On Account’"—this unlocks the Invoices and Payments tabs in the customer's profile.
- Click Save and proceed with the order.

Step 2: Processing an Order for an On-Account Customer
- Select the Customer and ring up their order as usual.
- Add items (e.g., 50 lbs of laundry).
- When reaching the payment screen, choose "On Account" as the payment method.
- A note will appear prompting for a signature on the receipt (optional but recommended for commercial accounts).
- Complete the transaction.

Repeat the process for multiple orders—each order placed on On Account will add to the customer's balance.
Step 3: Creating an Invoice for On-Account Orders
- Go to the Receive Payment page.
- Select the customer—orders that haven't been assigned to an invoice will appear.
- Click the "View Customer Profile" shortcut.
- Navigate to the Billing tab.
- Under Unassigned Orders, click Select All or choose specific orders.
- Click Create Invoice to generate a payable invoice.

Step 4: Managing & Printing Invoices
- Once the invoice is created, it becomes payable by the customer.
- Click on the invoice to view it in a new window.
- Options:
- Print the invoice.
- Save as a PDF for email or record-keeping.
- If a customer’s address is added, the invoice format aligns with windowed envelopes.
Step 5: Receiving a Payment for an Invoice
- Return to the Receive Payment page.
- Select the Customer and click on their open invoice.
- Enter the payment details:
- Payment Date
- Payment Method (e.g., check, credit card)
- Reference Number (if applicable)
- Amount Received
- Select the invoices to apply the payment to.
- Click Apply Payment to finalize.

The system supports:
- Partial Payments: If a customer pays less than the total amount.
- Overpayments: If a customer pays more than the invoice total, the overage is applied as store credit.
Step 6: Reviewing Paid & Unpaid Invoices
- Go to the Customer Profile and check:
- Open Invoices: Unpaid or partially paid invoices.
- Paid Invoices: Completed transactions.
- Click an invoice to view payment history.
Step 7: Voiding a Payment (If Needed)
- Go to the Payments tab in the customer's profile.
- Select the payment entry.
- Click Void This Payment (Requires manager/admin password).
- The voided payment will be removed.

Step 8: Tracking Invoices in Reports
- Invoice List Report:
- View outstanding invoices for any time period.
- Open and print invoices directly from the report.
-
Filter by customer name, invoice status, or date range.
Customer Statement:
- Generate a statement for any specific period.
- Print or send the statement to the customer for reference.

Following these steps ensures smooth handling of commercial On Account billing and invoicing. If needed, adjustments and payments can be tracked and managed efficiently!